안녕하세요.
오늘은 아두이노 Adafrouit NeoPixel 라이브러리에 포함된 strandtest 예제를 분석해보겠습니다.
strandtest 예제 열기


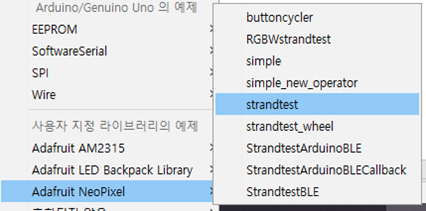
기본적으로 Adafrouit NeoPixel 라이브러리가 설치되면 예제가 같이 설치되는데
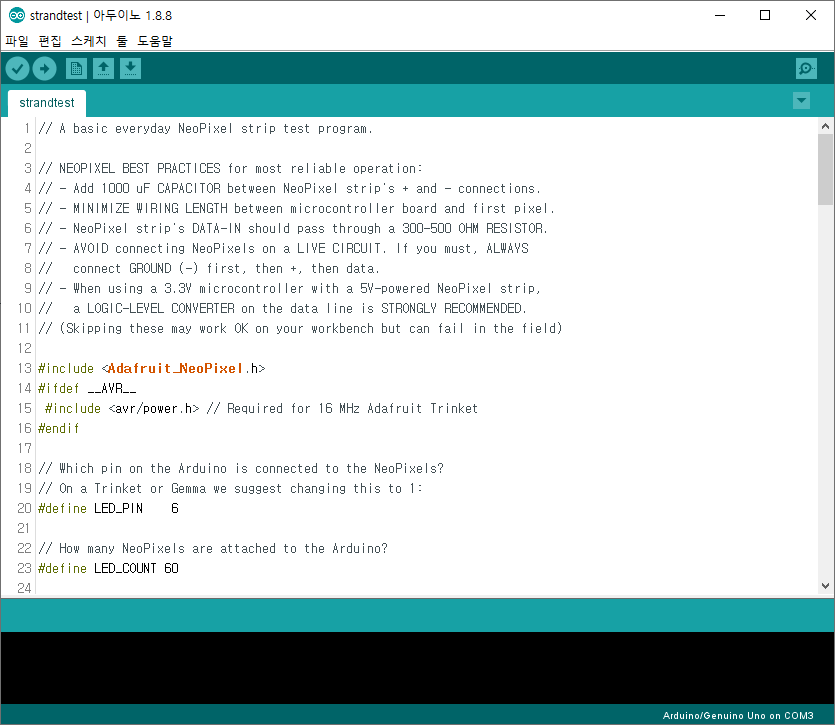
아두이노 IDE에서 [파일]-[예제]-[Adafruit NeoPixel] - [strandtest]를 클릭하여 예제 파일을 생성하면 됩니다.
예제에 대한 설명은 주석으로 달아놨습니다.
아 효과 중에 theatherChase라는 이름 있는데
옛날 극장 간판에 전구가 반짝이는 듯한 효과 인듯합니다.
#include <Adafruit_NeoPixel.h>

//고정적으로 사용할 내용을 미리 선언
#define LED_PIN 8     //네오픽셀에 신호를 줄 핀번호
#define LED_COUNT 60  //아두이노에 연결된 네오픽셀의 개수

Adafruit_NeoPixel strip(LED_COUNT, LED_PIN, NEO_GRB + NEO_KHZ800);
// 라이브러리에서 네오픽셀 객체를 선언
// 첫번째 인자 = 네오픽셀의 개수
// 두번째 인자 = 신호를 출력할 핀번호
// 세번째 인자 = 네오픽셀의 종류에따라 맞는 것을 아래대로 설정해주면 된다.
    /*
     * 종류에 따른 설정
     * NEO_KHZ800  800 KHz bitstream (most NeoPixel products w/WS2812 LEDs)
     * NEO_KHZ400  400 KHz (classic 'v1' (not v2) FLORA pixels, WS2811 drivers)
     *
     * NEO_GRB     Pixels are wired for GRB bitstream (most NeoPixel products)
     * NEO_RGB     Pixels are wired for RGB bitstream (v1 FLORA pixels, not v2)
     * NEO_RGBW    Pixels are wired for RGBW bitstream (NeoPixel RGBW products)
     */

void setup() {
  strip.begin();           // INITIALIZE NeoPixel strip object (REQUIRED)
  strip.show();            // 네오픽셀에 빛을 출력하기 위한 것인데 여기서는 모든 네오픽셀을 OFF하기 위해서 사용한다.
  strip.setBrightness(50); // 네오픽셀의 밝기 설정(최대 255까지 가능)
}

void loop() {

  // 스트립 길이를 따라서 설정된 색으로 채운다.
  // strip.Color(Red,   Green,   Blue) 스트립의 색상을 RGB순서대로 세팅해준다.각RGB마다 0~255까지 설정가능
  // colorWipe(스트립 색상, 딜레이 시간)
  colorWipe(strip.Color(255,   0,   0), 50); // Red
  colorWipe(strip.Color(  0, 255,   0), 50); // Green
  colorWipe(strip.Color(  0,   0, 255), 50); // Blue
  colorWipe(strip.Color(255, 255, 255), 50); // White


  // 극장간판에 달린 전구가 빛나는것과 유사한 효과
  // theaterChase(스트립 색상, 딜레이 시간)
  theaterChase(strip.Color(127, 127, 127), 50); // White, half brightness
  theaterChase(strip.Color(127,   0,   0), 50); // Red, half brightness
  theaterChase(strip.Color(  0,   0, 127), 50); // Blue, half brightness

  // 전체 스트립에 색을 흐르는 무지개빛처럼 돌아가며 출력
  rainbow(10);
  // 위에 theaterChase효과를 무지개빛으로 출력
  theaterChaseRainbow(50);

  //해당 함수들은 밑에 구현되어있다.
}

void colorWipe(uint32_t color, int wait) {
  for (int i = 0; i < strip.numPixels(); i++) { // For each pixel in strip...
    strip.setPixelColor(i, color);         //  Set pixel's color (in RAM)
    strip.show();                          //  Update strip to match
    delay(wait);                           //  Pause for a moment
  }
}

void theaterChase(uint32_t color, int wait) {
  for (int a = 0; a < 10; a++) { // Repeat 10 times...
    for (int b = 0; b < 3; b++) { //  'b' counts from 0 to 2...
      strip.clear();         //   Set all pixels in RAM to 0 (off)
      // 'c' counts up from 'b' to end of strip in steps of 3...
      for (int c = b; c < strip.numPixels(); c += 3) {
        strip.setPixelColor(c, color); // Set pixel 'c' to value 'color'
      }
      strip.show(); // Update strip with new contents
      delay(wait);  // Pause for a moment
    }
  }
}

void rainbow(int wait) {
  for (long firstPixelHue = 0; firstPixelHue < 5 * 65536; firstPixelHue += 256) {
    for (int i = 0; i < strip.numPixels(); i++) {
      int pixelHue = firstPixelHue + (i * 65536L / strip.numPixels());
      strip.setPixelColor(i, strip.gamma32(strip.ColorHSV(pixelHue)));
    }
    strip.show();
    delay(wait);
  }
}

void theaterChaseRainbow(int wait) {
  int firstPixelHue = 0;
  for (int a = 0; a < 30; a++) {
    for (int b = 0; b < 3; b++) {
      strip.clear();
      for (int c = b; c < strip.numPixels(); c += 3) {
        int hue = firstPixelHue + c * 65536L / strip.numPixels();
        uint32_t color = strip.gamma32(strip.ColorHSV(hue)); // hue -> RGB
        strip.setPixelColor(c, color);
      }
      strip.show();
      delay(wait);
      firstPixelHue += 65536 / 90;
    }
  }
}
실행 모습


기존의 예제를 이용해서 다양한 네오픽셀 작품들을 만들어보세요~
'연구노트 > 아두이노' 카테고리의 다른 글
| 아두이노와 AM2315 온습도 측정!(I2C 통신, AM2315 온습도 센서) (0) | 2020.12.11 |
|---|---|
| 아두이노 가변저항 사용하기!(analogRead(), analogWrite(), map()) (0) | 2020.12.09 |
| 아두이노 네오픽셀(NeoPixel) LED 다루기 (0) | 2020.09.24 |